Using RuuviTags with BlueRange Mesh
BlueRange Mesh can not only be used with the nRF52-DK or the nRF52840-DK from Nordic, but with many other boards with nRF52 Series SoCs.
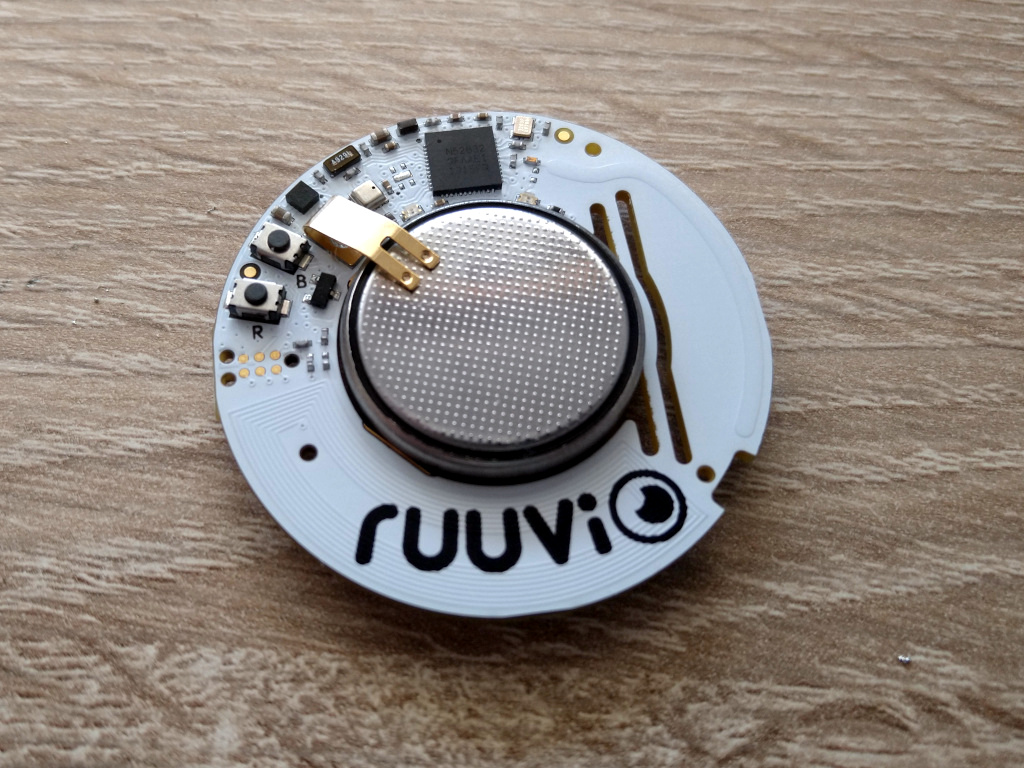
This article will teach you how to use the versatile RuuviTags from Ruuvi Innovations Oy together with BlueRange Mesh.
We will flash the prod_ruuvi_weather_nrf52 featureset which uses the RuuviWeatherModule that reads sensor data and sends it through the mesh to be advertised in a format compatible with the Ruuvi Station app from all connected nodes.
This will give you multiple sensor nodes utilizing BlueRange Mesh for establishing the self-finding, -maintaining, and -healing, bidirectional mesh based on scatter net logic. The mesh network is used to transport the sensor data from each node to every other node, which makes it possible to see sensor data from all mesh nodes regardless of the nodes you’re physically close to.
Requirements
To follow this tutorial we recommend that you have
-
at least two RuuviTags,
-
and either
This tutorial assumes you own the Ruuvi Devkit.
If you own a Segger programmer and are able to connect it to the RuuviTag correctly, the outputs from the commands will be the same as with the Devkit.
The (precompiled) firmware will — without modifications — only work on RuuviTags. It is however very easy to change the supported device to the nRF52-DK, just open config/featuresets/prod_ruuvi_weather_nrf52.cpp and follow the instructions.
|
Precompiled Firmware
For a quick start you can flash the precompiled firmware prod_ruuvi_weather_nrf52_merged.hex from the fruitymesh-…_precompiled.zip following Quick Start / Flashing Precompiled Firmware.
Building and Flashing
Please follow toolchain installation guide to setup your development environment. The commands in the following text were executed on a machine running Linux, you will have to adapt the paths according to your own setup.
We will begin with a shell in your clone of the BlueRange Mesh repository.
┏━ 2021-02-24 16:46:13 user@host:~/doc/code/fruitymesh
$ ls
buildsettings   config                      LICENCE.txt  softdevice
cherrysim       CONTRIBUTE.adoc             linker       src
CMake           cppcheck.cppcheck.template  README.adoc  util
CMakeLists.txt  docs                        sdk
┗━ ✓
We will first create the out-of-source build directory.
┏━ 2021-02-24 16:46:14 user@host:~/doc/code/fruitymesh
$ mkdir ../fruitymesh_build
┗━ ✓
Then we configure the build directory for building the firmware and specify the path to the ARM GCC 4.9 (downloading and extracting this was part of the Quick Start guide).
┏━ 2021-02-24 16:49:42 user@host:~/doc/code/fruitymesh
$ cmake -S. -B../fruitymesh_build -DBUILD_TYPE=FIRMWARE -DGCC_PATH=$HOME/var/local/gcc-arm-none-eabi/v4.9-2015q3/
-- The C compiler identification is GNU 4.9.3
-- The CXX compiler identification is GNU 4.9.3
-- The ASM compiler identification is GNU
-- Found assembler: /home/user/var/local/gcc-arm-none-eabi/v4.9-2015q3//bin/arm-none-eabi-gcc
-- Detecting C compiler ABI info
-- Detecting C compiler ABI info - done
-- Check for working C compiler: /home/user/var/local/gcc-arm-none-eabi/v4.9-2015q3//bin/arm-none-eabi-gcc - skipped
-- Detecting C compile features
-- Detecting C compile features - done
-- Detecting CXX compiler ABI info
-- Detecting CXX compiler ABI info - done
-- Check for working CXX compiler: /home/user/var/local/gcc-arm-none-eabi/v4.9-2015q3//bin/arm-none-eabi-g++ - skipped
-- Detecting CXX compile features
-- Detecting CXX compile features - done
-- Found Python3: /usr/bin/python3.9 (found version "3.9.1") found components: Interpreter
-- Added feature set: github_dev_nrf52
-- Added feature set: github_dev_nrf52840
-- Added feature set: github_mesh_nrf52
-- Added feature set: github_sink_nrf52
-- Added feature set: prod_ruuvi_weather_nrf52
-- target = github_dev_nrf52
-- target = github_dev_nrf52840
-- target = github_mesh_nrf52
-- target = github_sink_nrf52
-- target = prod_ruuvi_weather_nrf52
-- Configuring done
-- Generating done
-- Build files have been written to: /home/user/doc/code/fruitymesh_build
┗━ ✓
Now we will build the prod_ruuvi_weather_nrf52 featureset which will compile the firmware prod_ruuvi_weather_nrf52.out, transform it in to an Intel .hex file prod_ruuvi_weather_nrf52.hex and finally merge it with the SoftDevice (Nordics protocol stack) s132_nrf52_5.1.0_softdevice.hex.
┏━ 2021-02-24 16:51:32 user@host:~/doc/code/fruitymesh
$ cmake --build ../fruitymesh_build/ --target prod_ruuvi_weather_nrf52
Scanning dependencies of target prod_ruuvi_weather_nrf52
[  0%] Building CXX object CMakeFiles/prod_ruuvi_weather_nrf52.dir/config/featuresets/prod_ruuvi_weather_nrf52.cpp.obj
[  0%] Building C object CMakeFiles/prod_ruuvi_weather_nrf52.dir/sdk/sdk14/components/drivers_nrf/spi_master/nrf_drv_spi.c.obj
[  0%] Building CXX object CMakeFiles/prod_ruuvi_weather_nrf52.dir/src/c/drivers/bme280.cpp.obj
[  5%] Building CXX object CMakeFiles/prod_ruuvi_weather_nrf52.dir/config/boards/board_12.cpp.obj

   ... many more object files are built ...

[ 95%] Building C object CMakeFiles/prod_ruuvi_weather_nrf52.dir/sdk/sdk14/components/softdevice/common/nrf_sdh_soc.c.obj
[100%] Linking CXX executable prod_ruuvi_weather_nrf52.out
Creating hex file prod_ruuvi_weather_nrf52
Checking Size prod_ruuvi_weather_nrf52
   text	   data	    bss	    dec	    hex	filename
  84728	    128	  23402	 108258	  1a6e2	/home/user/doc/code/fruitymesh_build/prod_ruuvi_weather_nrf52.out
Total size is 84856
Merging with Softdevice prod_ruuvi_weather_nrf52
Parsing input files.
Merging file "s132_nrf52_5.1.0_softdevice.hex" into output.
Merging file "prod_ruuvi_weather_nrf52.hex" into output.
Storing merged file.
[100%] Built target prod_ruuvi_weather_nrf52
┗━ ✓
The previous step generated the merged firmware file prod_ruuvi_weather_nrf52_merged.hex ready for flashing onto your RuuviTag.
Our CMake build system generates …_flash targets for every featureset, which call upon nrfjprog from the _nRF Command-Line Tools_ to flash the firmware on a connected device.
| Please remove the battery from the RuuviTag before pressing it on the Ruuvi Devkit. |

If you use a devkit from Ruuvi (with the shield plugged in to the Nordic nRF52-DK) and have no RuuviTag pressed on the pogopins you will see the following error when you build the …_flash target.
This happens because the shield forces the Segger chip (the big quad flat package next to the Micro-USB port) on the nRF52-DK to always connect via the debug header (the row of male pins above the Segger chip) to an external chip and not directly to the nRF52832 on the nRF52-DK.
┏━ 2021-02-24 17:05:02 user@host:~/doc/code/fruitymesh
$ cmake --build ../fruitymesh_build/ --target prod_ruuvi_weather_nrf52_flash
[100%] Built target prod_ruuvi_weather_nrf52
Scanning dependencies of target prod_ruuvi_weather_nrf52_flash
ERROR: JLinkARM DLL reported an error. Try again. If error condition
ERROR: persists, run the same command again with argument --log, contact Nordic
ERROR: Semiconductor and provide the generated log.log file to them.
make[3]: *** [CMakeFiles/prod_ruuvi_weather_nrf52_flash.dir/build.make:76: CMakeFiles/prod_ruuvi_weather_nrf52_flash] Error 33
make[2]: *** [CMakeFiles/Makefile2:572: CMakeFiles/prod_ruuvi_weather_nrf52_flash.dir/all] Error 2
make[1]: *** [CMakeFiles/Makefile2:579: CMakeFiles/prod_ruuvi_weather_nrf52_flash.dir/rule] Error 2
make: *** [Makefile:138: prod_ruuvi_weather_nrf52_flash] Error 2
┗━ ✗ (2)
To programm the RuuviTag, just press it on the pogopins such that the three alignment pins slide into the holes of the RuuviTag. Then hold it on the shield and execute the flash command (a bit of an excercise for your hand and the reason Ruuvi provided you with cable ties).
┏━ 2021-02-24 17:06:04 user@host:~/doc/code/fruitymesh
$ cmake --build ../fruitymesh_build/ --target prod_ruuvi_weather_nrf52_flash
[100%] Built target prod_ruuvi_weather_nrf52
Parsing image file.
Erasing user available code and UICR flash areas.
Applying system reset.
Checking that the area to write is not protected.
Programming device.
Applying system reset.
Run.
[100%] Built target prod_ruuvi_weather_nrf52_flash
┗━ ✓
Now you just push the RuuviTags on CR2477 batteries and they will startup and connect to each other automatically.
When you push your RuuviTags on CR2477 batteries you will be able to add the tags to your Ruuvi Station app on your Smartphone.

If you want to run the firmware on other boards, you will need to modify config/featuresets/prod_ruuvi_weather_nrf52.cpp.